


Tired of wrestling window units in and out every season while they block half your view? Through-the-wall air conditioner installation solves both problems permanently with a flush-mounted unit that stays put year-round. This guide breaks down each step, helps you figure out when DIY makes sense versus calling a pro, and shows you how to maximize efficiency from your new unit.
Cost Breakdown
|
Expense |
DIY Cost |
With Professional |
|
AC Unit |
$400–900 |
$400–900 |
|
Wall Sleeve |
$100–200 |
$100–200 |
|
Framing & Materials |
$50–150 |
Included |
|
Labor |
$0 |
$400–800 |
|
Electrical (if needed) |
$150–400 |
$150–400 |
|
Total |
$700–1,650 |
$1,150–2,300 |
Costs vary by region, wall type, and electrical requirements. Masonry walls and 230V circuits push costs toward the higher end.
What Makes Through-the-Wall Installation Different
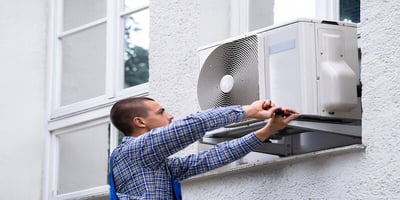
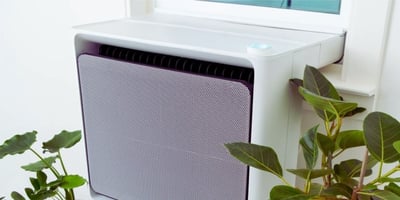
Before you grab your circular saw, let's talk about what makes through-the-wall air conditioners different from window units. These mount inside a metal sleeve permanently fixed into your exterior wall. Think of it like a drawer sliding into a dresser. Flush. Clean. No awkward overhang.
Here's where it gets serious. That sleeve creates a structural opening. Mess up measurements, skip proper framing, or forget drainage tilt? You're looking at water damage. Air leaks. Maybe worse. Window units forgive sloppy work. Wall units don't.
Tools and Materials You'll Need
Gather everything now. Nothing murders your momentum faster than a mid-project hardware store run.
For cutting, you'll need a circular saw (masonry blade for brick or stucco), a reciprocating saw for studs, a drywall saw, a tape measure, 4-foot level, and stud finder with electrical detection. Installation supplies include the metal wall sleeve, 2x4 lumber for framing, wood screws, weatherstripping, spray foam, exterior-grade caulk, and trim pieces. Most units demand a dedicated 120V circuit, though larger units above 14,000 BTU often require 230V service. And don't skip safety gear. Glasses, gloves, respirator, hearing protection.
Step-by-Step Through-the-Wall Air Conditioner Installation
 Step 1. Choose and Verify Your Location
Location matters. A lot. You need an exterior wall with electrical access, positioned 1-5 feet above floor level. Too low and cool air pools at your ankles. Too high and you're cooling the ceiling.
Sweep the target wall with your stud finder. Mark every stud with painter's tape. Switch to electrical detection mode and sweep again. Hitting a live wire with your saw? Bad day. Check outside too. Bushes or fences within 12 inches of your planned exhaust will choke airflow.
Step 2. Mark Your Cutout
Most units ship with a template. Use it. No template? Take your sleeve dimensions and add 2.5 inches on each side for framing lumber.
Study that outline and count how many studs you'll cut through. One stud? Easy reframe. Three studs? You're building a proper header beam. Your level matters more than any other tool here. A quarter inch off-level compounds across the unit's width, leaving you with drainage problems and a crooked-looking install.
Step 3. Open Up the Interior Wall
Kill the power to the nearby circuits at the breaker first. Score your outline with a utility knife, then cut through with a drywall saw. Go slow around corners if you want clean edges that don't require tons of patching later. Pull out the drywall section.
Now put that respirator on. This part gets messy. Cut away any insulation inside your opening with a utility knife, then mark the studs that need cutting. They need to be flush with your outline's top and bottom edges. A reciprocating saw tears through them quick, but support those stud sections before you cut. Dropping lumber on your foot isn't fun.
Step 4. Build Your Support Frame
You just cut through load-bearing studs. Your wall lost structural integrity. Time to fix that.
Cut 2x4s to span horizontally across the top and bottom of your opening. HVAC folks call these headers and sills. They transfer load around your hole to the remaining studs. Nail or screw them firmly into those uncut studs. Add vertical 2x4 pieces connecting header to sill on both sides. You've now built a rigid frame that'll support your AC sleeve.
Step 5. Cut Through the Exterior Wall
From inside, drill pilot holes through each corner of your opening. Head outside. Connect those holes with straight lines using your level.
What you do next depends on your siding. Vinyl pops off easily with a siding removal tool before you cut the sheathing. Brick or stucco? Break out that masonry blade and budget extra time. Work carefully. Exterior repairs cost more and look way more obvious than interior fixes.
Step 6. Install the Metal Sleeve
Slide your sleeve into the opening from outside. One detail everyone forgets. The sleeve needs to tilt slightly outward. About a quarter inch over its depth. This drainage tilt sends condensation outside instead of letting it pool inside your wall cavity where it'll cause rot and mold.
Shim as needed to hit that proper tilt while keeping the sides level. Secure everything to your framing with screws through the pre-drilled flanges.
Step 7. Weatherproof and Insulate
Gaps around the sleeve invite moisture, drafts, and bugs.
Fill the space between the sleeve and the framing with spray foam. Easy on the trigger, though. Expanding foam generates surprising pressure and can warp the metal. Run exterior-grade caulk around the outside perimeter where sleeve meets wall. Add a second bead where siding meets the sleeve flange. Inside, install weatherstripping around the sleeve opening where your AC unit will seat.
Step 8. Handle Electrical Connections
Most through-the-wall units need dedicated circuits. Running new electrical from your breaker panel? That falls squarely into "hire an electrician" territory for most people. Improper wiring causes fires. Code violations complicate home sales.
Already got a suitable outlet nearby? Maybe you can use it. But verify the circuit amperage first. A 12,000 BTU unit pulling 12 amps on a 15-amp circuit leaves almost nothing for other devices.
Step 9. Install the Unit and Finish
Electrical done? Sleeve installed? The hard part's behind you.
Slide your through-the-wall air conditioner into the sleeve from inside. Most units weigh 60-100 pounds, so grab a helper. The unit should seat firmly against the weatherstripping with zero visible gaps. Secure it with the included mounting hardware.
Patch any drywall damage with joint compound. Let it dry. Paint to match. Outside, install trim pieces that work with your siding type. Metal J-channel pairs well with vinyl. Wood trim suits traditional exteriors. Caulk all trim edges.
When Professional Installation Makes Sense
 DIY works great if you're comfortable with power tools and basic electrical concepts. But some situations genuinely warrant hiring out the through-the-wall air conditioner installation.
Call a pro if you have
- Brick, concrete, or stucco walls requiring masonry cutting
- No existing dedicated circuit near the installation spot
- Three or more studs to cut through (complex header framing)
- A home built before 1980 with potential asbestos or lead paint
- Zero experience with structural framing or drywall repair
Local HVAC contractors do this work all the time. Most wrap up in 2-4 hours including cleanup. Get quotes from at least three before you commit.
Mistakes That Cost DIYers Time and Money
Three errors show up constantly. First, forgetting the drainage tilt. Water pools inside the wall, and six months later you're dealing with mold remediation. Second, undersizing the header beam when cutting multiple studs. Your wall sags. Third, skipping the weatherstripping between sleeve and unit. That gap bleeds conditioned air straight outside. Each mistake is preventable with five extra minutes of attention.
Get More From Your Unit With Smart Controls
You just invested hours (or hundreds of dollars) into this installation. The included remote works fine. But "fine" leaves money on the table.
Adding a smart AC controller connects your through-the-wall unit to your smartphone. Installation takes 60 seconds. Plug it in, mount it where it can see your AC's infrared receiver. Done.
Geofencing adjusts temperature based on your phone's location. Leave for work and the AC shifts to energy-saving mode. Head home and cooling kicks on before you arrive. Users report up to 25% drops in cooling costs. The controller pays for itself before summer ends.
Maintenance Keeps Everything Running
Poorly maintained units often fail within 10 years. Well-maintained units last 15-20. That extra decade adds up.
Monthly filter cleaning tops the priority list. Pull the filter, vacuum loose dust, then rinse under warm water. Let it dry completely before reinstalling. Wet filters grow mold. Clogged filters force compressors to work harder, driving up bills.
Clear debris from exterior grilles regularly. Leaves accumulate fast, especially in the fall. Annual professional servicing covers coil cleaning, refrigerant checks, and electrical inspections. Schedule it before the cooling season, usually April or May.
The Real Payoff Comes After Installation Day
Most people spend weeks researching BTU ratings and efficiency scores, but the real payoff comes after installation day. A properly installed unit with smart automation and regular maintenance will outperform a premium unit that's neglected. Get the installation right, add intelligent controls, and your through-the-wall AC becomes the most practical cooling solution for any single room.