


Mini splits offer efficient cooling and heating without the complexity of ductwork. While professional installation remains an option, many homeowners successfully tackle their own mini split installation, saving substantially on labor costs while gaining valuable system knowledge. Let's walk through the process step by step.
Preparing for Your Mini Split Project
A successful mini split AC installation begins with proper planning. Take time to understand your space, electrical requirements, and local regulations before purchasing any equipment.
Picking the Perfect Spot: Indoor Considerations
The indoor air handler location significantly impacts both comfort and efficiency. Look for a wall with unobstructed space at least 6 inches from the ceiling and away from direct sunlight, which would make the unit work harder. Avoid areas near heat sources like lamps or electronics, and ensure the location allows air to circulate freely throughout the room.
Central placement provides even distribution—avoid corners when possible. Remember that cool air flows downward and outward, so position the unit accordingly to prevent cold spots or drafts hitting regular seating areas.
Finding the Ideal Outdoor Home for the Condenser
Your outdoor unit needs both breathing room and protection for optimal performance. Allow at least 12 inches of clearance on all sides for proper airflow, and position the unit at least 24 inches from any structures to reduce noise transmission. Select locations protected from strong winds when possible, and avoid areas where falling debris like leaves or twigs might clog the condenser.
In colder regions, consider snow accumulation patterns and elevate the unit as needed. Always keep the condenser level for proper oil return to the compressor. An often-overlooked consideration: place the outdoor unit within the manufacturer's maximum line length from the indoor unit (usually 50-75 feet) to maintain efficiency.
Understanding the Electrical Needs
Most residential mini splits require dedicated 220/240V circuits with properly sized breakers (typically 15-30 amps depending on BTU rating). You'll need 10-12 gauge wiring (varies by model specifications) and a weatherproof disconnect box installed near the outdoor unit. Always match your electrical setup to the specific requirements in your unit's manual rather than relying on general guidelines.
Checking Local Codes and Permits
This crucial preparation step should never be skipped during mini split installation. Most jurisdictions require building permits for new HVAC installations, electrical permits for dedicated circuits, and potentially inspections during and after installation. Some areas have specific requirements about where condensate can drain or noise ordinances affecting outdoor unit placement. A quick visit to your local building department saves headaches later.
Gathering Your Installation Arsenal
The mini split install process requires both common household tools and some specialized equipment. Let's break them down by category.
Standard tools most homeowners already have include:
- Drill with various bits (including hole saws)
- Level (2-foot minimum length recommended)
- Tape measure and utility knife
- Wire strippers and crimpers
- Adjustable wrenches, pliers, and screwdrivers
For proper mini split AC installation, you'll also need specialized equipment:
- Refrigerant manifold gauge set
- Vacuum pump for evacuating the lines
- Micron gauge for verifying vacuum quality
- Torque wrenches calibrated in inch-pounds and foot-pounds
- Flaring tool for copper lines (unless using pre-flared line sets)
Good news for beginners: many systems now come pre-charged with refrigerant and include pre-flared line sets, simplifying the more technical aspects of installation.
Don't forget essential supplies and safety gear. You'll need Teflon tape, pipe insulation, electrical tape, line hide material, wire nuts, and mounting hardware. For personal protection, invest in work gloves, safety glasses, a dust mask for drilling, and knee pads – you'll thank yourself later.
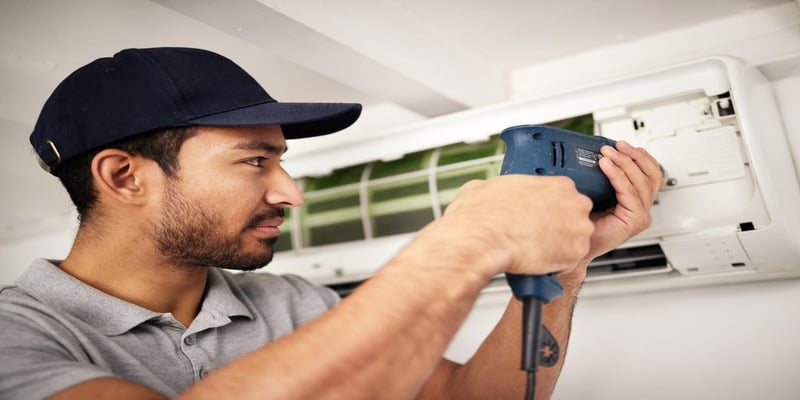
Mounting the Indoor Whisperer: Securing the Air Handler

The indoor unit installation sets the foundation for your system's performance. This process involves precise measurements, careful drilling, and proper connection techniques.
Using the Mounting Plate: Mastering the Template
Most mini split install kits include a paper or cardboard template for positioning the mounting plate. Hold the template against your chosen wall location and use a level to ensure it's perfectly horizontal. Mark the screw hole positions through the template, then double-check measurements against the actual mounting plate before drilling.
Pro tip: Use a stud finder to locate wall framing. While the mounting plate usually spans multiple studs, hitting at least two provides the most secure installation.
Drilling the Passage: Creating the Conduit Hole
The hole connecting indoor and outdoor units demands precision. Start by drilling at a 15-degree downward angle toward the exterior – this slope helps condensate drain naturally and prevents water infiltration. Size the hole about 3 inches in diameter (check your manual for specific recommendations).
Begin drilling from inside and penetrate partially through, then finish from outside to prevent wallboard damage. Insert the wall sleeve (usually PVC pipe) through the hole and seal around it with caulk on both sides. The downward angle cannot be overstated—it's essential for proper drainage.
Connecting Initial Wiring and Refrigerant Lines Inside
Before hanging the indoor unit, feed the communication wires through the wall passage and run refrigerant lines through the same hole. Attach the drain line to the indoor unit and secure any electrical connections per the manual. Then carefully lift the indoor unit onto the mounting plate, ensuring it locks securely with an audible click. The unit should feel stable when gently pulled forward.
The Outdoor Workhorse: Setting Up the Condenser
With the indoor unit mounted, your attention turns to the outdoor component of your mini split AC installation. This stage involves creating a stable foundation and establishing proper connections.
Your condenser needs a solid foundation. Concrete pads provide the most stable base, while specialized plastic feet offer vibration reduction. Wall brackets work well for limited ground space. Whatever mounting method you choose, ensure the unit remains perfectly level using shims when necessary. An unlevel condenser leads to compressor problems over time.
When running the line set between units, handle the refrigerant lines with care. Gently uncoil the copper lines to avoid kinking and guide them through the wall sleeve from indoor to outdoor. Maintain gradual bends without sharp angles and keep protective caps on line ends until final connection. Bend the line set with purpose rather than forcing it—refrigerant flow efficiency depends on smooth paths without restrictions.
Creating leak-free connections at the outdoor unit requires attention to detail:
- Remove protective caps from both line ends
- Apply a drop of refrigeration oil to flare surfaces
- Align flared ends with outdoor unit fittings
- Hand-tighten nuts before using a torque wrench
- Tighten to the exact specification in the manual
Over-tightening damages flares while under-tightening guarantees leaks. The torque wrench isn't optional here—it's essential for success.
For proper communication between units, match wire colors precisely per the manufacturer diagram and use waterproof wire nuts for outdoor connections. Secure wires in designated terminals (usually labeled) and protect wire runs from physical damage. Mini splits use low-voltage control wiring—usually 14-18 gauge. These wires carry signals rather than power, so proper connections ensure responsive operation. Connecting Indoor and Outdoor Units
After completing both indoor and outdoor installations, it's time to establish the final connections that unite your system. This critical phase of mini split installation requires attention to detail to ensure efficient operation and prevent future issues.
Finishing the Line Set Connections
Double-check all flare nuts for proper tightness, then wrap refrigerant line connections with insulating tape. Bundle lines neatly without compression and secure the bundle every few feet with appropriate clips. Remember that the suction line (larger diameter) must remain insulated along its entire length to prevent condensation and efficiency loss.
Ensuring Proper Drainage
Proper condensate management prevents water damage to your home. Route the primary drain line downward and away from the foundation. For some models, you'll need to install a P-trap if the manual recommends it. In situations where gravity drainage isn't possible, consider a condensate pump as an alternative solution.
Test the drainage system by pouring water into the indoor unit drain pan. The water should flow freely without pooling, confirming proper slope in your installation.
Protecting the Line Set
Exposed refrigerant lines need protection from the elements. Line hide covers provide UV protection and visual appeal, while specialized line set covers include insulation and water resistance. Secure all covers properly to prevent vibration and weather damage. For homes in harsh climates, additional insulation or heat tape may be necessary for exposed condensate lines to prevent freezing during winter months.
The Crucial Steps: Evacuating and Charging
This phase represents the most technical aspect of DIY mini split installation. Air and moisture in refrigerant lines cause component damage, reduced efficiency, and potential system failure. Even pre-charged systems require line evacuation before releasing refrigerant.
Connect manifold gauges to service ports, attach your vacuum pump, and run it for at least 30 minutes. Target below 500 microns with minimal rise after stopping. For pre-charged systems, simply open the service valves after evacuation to release refrigerant into the system. Manual charging requires EPA certification and professional tools, so beginners should stick with pre-charged systems.
After charging, verify all connections with leak detection solution. Bubbles indicate escaping refrigerant and require immediate attention. Pay special attention to valve stems and flare connections, as these are common leak points.
Powering Up and First Run
With all connections secure, it's time for the moment of truth – powering up your new system. This final stage of mini split AC installation requires careful observation and testing.
Making the Final Electrical Connections Safely
Confirm power is OFF at the breaker before connecting line voltage wires to the disconnect box. Run proper gauge wire from disconnect to condenser and secure all electrical connections per code requirements. Replace all access panels and double-check wire routing to ensure it doesn't contact refrigerant lines or moving parts.
System Testing: The Initial Startup
For initial startup, restore power at the breaker and set the remote to cooling mode at a moderate temperature. Listen for the indoor fan starting and verify the outdoor unit activates after a short delay. Within 5-10 minutes, you should feel cool air from the indoor unit. This startup sequence intentionally delays compressor operation to protect internal components.
During the first hours of operation, watch for steady, even airflow from the indoor unit. Normal operating sounds include a slight whooshing, but banging or screeching indicates problems. Verify condensate is draining properly and no frost is forming on refrigerant lines. Record normal operating pressures from the gauges for future reference—they provide valuable baseline data for troubleshooting.
Troubleshooting Common Installation Hurdles
Even careful installation of a split AC system can encounter issues. For power problems, verify breaker position, disconnect switch status, and remote battery condition. Remote control unresponsive? Try resetting by removing batteries for 30 seconds and clearing obstructions between remote and unit.
For refrigerant leaks, slightly tighten flare connections without over-torquing. Unusual noises often stem from loose mounting hardware or pipes contacting walls. Know when to call professionals: persistent leaks, unexplained error codes, insufficient cooling despite proper installation, or unusual frost patterns all warrant expert assistance.
Making Your Mini Split Air Conditioner Smart with Sensibo
 After completing your split AC unit installation, consider enhancing functionality with smart controls. Sensibo devices add intelligence to standard mini splits without complex modifications. The Sensibo Sky smart AC controller replaces remote control functions while communicating with your home WiFi network.
Installation takes minutes: mount the device within line-of-sight of your indoor unit, connect to power, and follow the app instructions to pair with your specific mini split model. The system uses infrared signals, requiring no electrical or refrigerant modifications.
Key benefits include smartphone control from anywhere, temperature scheduling by day and time, and location awareness that adjusts settings based on your proximity. Many users report 20-30% energy savings through features that prevent unnecessary runtime when spaces are unoccupied and gradually adjust temperatures to avoid peak power consumption.
FAQ
How long does a typical mini split installation take for a beginner?
Most beginners complete a single-zone installation in 6-8 hours. Multi-zone systems typically require a full weekend. The most time-intensive aspects usually involve mounting brackets securely and drilling the wall passage properly.
Can I really do a DIY mini split installation without HVAC experience?
Yes, with important caveats. Pre-charged systems with quick-connect fittings are specifically designed for DIY installation. Success depends on carefully following instructions, taking time with critical steps, and knowing when a particular task exceeds your skill level.
What are the risks involved in the installation of a split AC system?
Primary risks include refrigerant leaks from improper connections, electrical hazards from incorrect wiring, water damage from poor condensate management, and reduced system lifespan from improper vacuum procedures. Most risks decrease significantly with thorough research and patience.
Do I need a special electrical circuit for my mini split AC installation?
Yes, nearly all mini splits require a dedicated circuit sized specifically for the unit's power requirements. The circuit must have the correct wire gauge, breaker size, and disconnect location per local electrical code. This aspect often benefits from professional electrician involvement.
How often should I perform maintenance after my split AC unit installation?
Regular maintenance includes monthly filter cleaning (more often in dusty conditions), seasonal condenser coil cleaning (typically spring), annual condensate drain line cleaning, visual inspection of refrigerant lines quarterly for damage, and cleaning indoor coils annually. With proper maintenance, quality mini splits typically deliver 15+ years of reliable service.