A Comprehensive Guide to Cleaning Your Window AC Unit
Key Takeaways
- Dirty filters force your AC to consume 15-25% more electricity, translating to $50-150 in wasted energy costs per cooling season for an average 10,000 BTU unit.
- Monthly filter cleaning prevents most problems, while coils and drain channels need attention twice per season-once before summer starts and again mid-season during peak use.
- Mold growth happens fast in neglected units. Standing water in drain pans and damp filters create colonies within 48 hours, especially in humid climates where condensation runs constantly.
- Bent coil fins reduce airflow by up to 30%, making your unit work harder while cooling less effectively. A $5 fin comb fixes this during routine cleaning.
- Most window AC failures stem from maintenance neglect rather than mechanical defects. Clogged drain channels cause water damage, dirty coils lead to compressor strain, and restricted airflow triggers overheating shutdowns.
- Professional deep cleaning costs $75-150, but doing it yourself takes 45-60 minutes and requires less than $20 in supplies for most units.
Your window AC unit is likely filthier than you think. Behind that front grill sits a collection of dust, mold spores, pet dander, and debris that forces your unit to work 15-25% harder while circulating contaminated air back into your room. This guide walks you through the actual cleaning process—from basic filter maintenance to dealing with stubborn mold—so you can restore your unit's efficiency, lower your energy bills, and breathe cleaner air.
The Real Cost of Skipping This Chore
Most window AC units don't die from old age—they suffocate. Dust on coils blocks heat transfer, forcing the compressor to run longer cycles. A moderately dirty filter adds $8-12 monthly to your electric bill for a 10,000 BTU unit. Grimy coils add another $10-15. Over a 5-month cooling season, that's $90-135 wasted—enough to buy a replacement unit every three summers.
The mechanical toll compounds. Clogged drains corrode electrical connections. Dirty coils strain the compressor, cutting its 10-12 year lifespan to 6-8 years. Restricted airflow causes freeze-ups that crack refrigerant lines. Most "broken" units failed from preventable maintenance issues, not defects.
Your air quality suffers invisibly. Mold growing on damp coils aerosolizes spores with every cooling cycle. Dust mite waste trapped in filters becomes airborne. People attribute headaches and congestion to seasonal allergies, never suspecting their AC pumps contaminated air 8-10 hours daily.
Catching problems early: Smart AC controllers track energy consumption patterns and runtime data, alerting you when efficiency drops signal dirty components. Instead of guessing when cleaning is needed, you see exactly when performance degrades—typically 2-3 weeks before you'd notice cooling problems. This lets you clean on an optimal schedule rather than waiting for symptoms.
Warning signs demanding immediate attention: Units freezing up with ice on coils or refrigerant lines. Water dripping indoors instead of out the back. Rooms taking twice as long to cool compared to last season. Musty odors when the unit starts. Rattling or grinding noises that weren't there before.
Getting Set Up: The 20-Minute Prep
 Your Shopping List (Under $20)
Core cleaning supplies: Dish soap, warm water, two microfiber cloths (one wet, one dry), and a vacuum with brush attachment handle 80% of the work. An old toothbrush or soft-bristle brush reaches between coil fins where debris hides.
The upgrade items: Coil cleaner spray ($8-12) dissolves grease and grime that soap can't touch—worth buying if you haven't cleaned in over a year. A fin comb ($5-8) straightens bent aluminum fins that choke airflow. These pay for themselves in restored efficiency.
Protection gear: Gloves and safety glasses. Coil cleaner contains harsh chemicals, and disturbing year-old mold colonies releases spores you don't want in your eyes or lungs.
To Remove or Not to Remove
In-place cleaning works when:
- Your filter needs washing but the unit still cools adequately
- You're doing monthly maintenance touchups
- The unit weighs over 70 pounds and removal seems risky
- Window brackets make removal complicated
Pull it out completely when:
- Mold growth is visible or persistent odors won't go away
- Water leaks from places other than the designated drain
- Back coils look caked with dirt (visible through rear grill)
- You haven't deep cleaned in 2+ years
Most basic cleanings happen with the unit installed. Pop the front panel, pull the filter, vacuum what you can reach, and you're done in 15 minutes. Deep cleaning means full removal—you need access to drain channels, back coils, and chassis internals that in-place cleaning can't touch.
Safety Steps That Actually Matter
- Power down properly: Unplug the unit and wait 10 minutes before touching internal components. Capacitors can hold charges even after disconnection, though most window units discharge quickly. Older units warrant testing the plug with a voltage tester.
- Prepare the removal zone: Clear the area below your window—a 60-pound AC dropped from the second floor destroys the unit and whatever it hits. Have a sturdy table or sawhorses ready at comfortable working height. Spread a tarp or old towels underneath since cleaning releases trapped water and grimy runoff.
- Get help for heavy units: Anything over 50 pounds needs two people for safe removal. Upper-floor installations demand extra caution—one person steadies from inside while another supports from outside if possible.
- Work in a ventilated space: Coil cleaner fumes in a closed garage cause headaches and respiratory irritation within minutes. Open doors or work outdoors.
The decision shortcut: Moderately dusty filter but decent cooling? Stay in-place this time and schedule full removal for pre-season cleaning next year. Visible mold, weird smells, or water where it shouldn't be? Pull it out now—you need full access to fix those problems.
The Filter Situation
Identify What You're Working With
Pull the filter from your front panel—it slides out from the top or bottom. Foam filters feel spongy and compress easily, usually gray or white, about half an inch thick. Mesh filters look like rigid window screen material over a plastic frame. Pleated filters (less common in window units) resemble accordion-folded paper and are disposable—water destroys them.
 Basic Cleaning Approach
Foam: Soak in warm soapy water, squeeze gently (don't wring), rinse until water runs clear. Takes about 10 minutes of active cleaning.
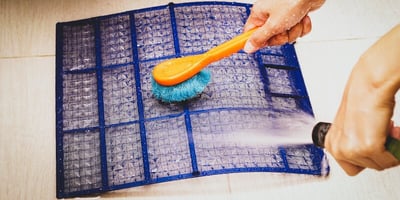
Mesh: Strong water stream first, then scrub with a soft brush and dish soap. Rinse thoroughly and check against light to verify all mesh openings are clear.
Pleated: Replace rather than clean. Vacuuming only removes surface dust and doesn't restore efficiency.
The Critical Drying Mistake
Even slightly damp filters create mold within 48 hours. Foam needs 24-48 hours to dry completely in ventilated air (12-18 hours with a fan). Mesh dries in 4-6 hours. Test by touch—no cool dampness or visible moisture before reinstalling.
Cleaning Schedule and Replacement Triggers
Monthly cleaning during active use prevents most problems. Dusty environments, pets, or constant operation warrant checks every two weeks. How often you should clean your air conditioner filters depends on your specific situation, but monthly remains the safe baseline.
Replace foam when: Material tears, develops holes, won't spring back after squeezing, or retains odors after washing. Most foam filters last 2-3 years.
Replace mesh when: Frame cracks, mesh tears or develops holes, metal mesh shows rust, or bent sections won't flatten.
Tackling the Coils Without Damaging Them
 Why Both Sides Matter
Your AC has two coil sets doing opposite jobs. Front evaporator coils absorb heat from indoor air, while back condenser coils dump that heat outside. Dirty evaporator coils can't absorb heat efficiently—your compressor runs constantly without cooling adequately. Grimy condenser coils can't release heat, causing overheating and potential failure. Clean one but ignore the other and you've solved nothing.
Energy loss from dirty coils is measurable: 30-40% efficiency drop with moderate buildup. The grime isn't just dust—cooking grease, smoke residue, and outdoor pollution create sticky films that water alone won't remove.
The Cleaning Process
Vacuum both coil sets first using a brush attachment, working gently along fin direction. Aluminum fins bend easily and restrict airflow even when clean.
Apply coil cleaner foam liberally. Let it sit 10-15 minutes while it dissolves grime—the foam turns brown or gray as it works. Front coils typically self-rinse through normal condensation. Back coils (requiring unit removal for access) need a gentle garden hose rinse afterward, spraying from inside outward to push debris out.
Bent fin repair: A fin comb ($5-8) straightens damaged fins in minutes. Most window units use 14-16 fins per inch. Insert the matching blade at the bottom of bent sections and pull straight upward. Focus on areas where multiple fins bend together—these cause the biggest airflow restrictions.
Products that work: Foaming coil cleaner (Nu-Calgon, AC-Safe), dish soap for light cleaning, spray bottles for rinsing.
Products that destroy coils: Bleach (corrodes aluminum and copper), pressure washers (bend fins irreparably), abrasive brushes (scratch protective coatings), ammonia cleaners (damage refrigerant lines).
For techniques handling heavily oxidized aluminum, stubborn grease, or salt corrosion in coastal areas, learn how to clean air conditioner coils properly using methods matched to your specific conditions.
Drying Requirements
Air dry 2-3 hours minimum before reassembly. Water trapped in fin channels corrodes metal and causes electrical shorts. Check by looking through coils at a light source—wet sections appear darker. Run your finger along bottom fins to verify no dampness remains.
The Parts Most People Forget
Drain Channels: Where Water Becomes Disaster
Every window AC generates condensation—up to 2 gallons daily in humid climates. This water needs to escape through drain channels and out the back. Clog these channels and water backs up into electrical components, corrodes the chassis, or drips into your room.
Locate the drain system: Flip the unit upside down or tilt it back after removal. You'll see a shallow pan under the evaporator coils collecting condensation. Channels or small holes route water from this pan toward the back of the unit. Some designs use a slinger ring—a small paddle wheel that flings water onto the hot condenser coils where it evaporates.
Clear the blockage: Algae growth, dust, and debris create sludge that plugs drain holes. Use a pipe cleaner, straightened wire hanger, or turkey baster with diluted vinegar to flush channels. Push the pipe cleaner through drain holes until it emerges on the other side. Pour a cup of diluted vinegar (1:1 with water) through the drain pan and watch it flow out the back—if it pools instead, keep clearing.
Prevention: Drop an algae prevention tablet (sold for AC drain lines, around $8 for a year's supply) into the drain pan at season start. These slowly dissolve, releasing biocide that prevents organic growth without harming the unit.
 Exterior Case and Vents
The plastic or metal housing accumulates kitchen grease (if near cooking areas), dust, smoke residue, and fingerprints. Dirty exteriors look bad but also trap heat, reducing the unit's ability to dissipate warmth through the case.
Wipe down all exterior surfaces with soapy water and a microfiber cloth. Pay attention to the top surface where dust settles thickest. Clean the adjustable vents and louvers—these collect grime in the pivot points that makes them stick or squeak. A cotton swab reaches tight spaces around vent slats.
For stubborn grease or nicotine residue, use a degreasing cleaner. Rinse thoroughly so no cleaning product remains to attract fresh dust. Dry completely before reinstalling to prevent water from running into the window track or wall.
Fan Blades: The Hidden Dust Magnets
The blower fan sits behind the evaporator coils, pulling air through the unit. Fan blades accumulate dust that throws off balance, causing vibration and noise. Dirty blades also move less air, reducing cooling capacity.
Access limitations: Most window units require significant disassembly to reach fan blades directly. If your model allows front panel and filter removal that exposes the fan, clean it. Otherwise, spray coil cleaner through the accessible gaps—some will reach the fan blades. Use a flashlight to check through the coil fins and confirm fan blade condition.
When you can reach them: Wipe each blade individually with a damp cloth. Stubborn buildup needs a soft brush and soapy water. Ensure the motor shaft area stays dry—water in the motor bearing causes failure. Spin the fan by hand after cleaning to verify smooth, quiet operation without wobbling.
The Window Installation Area
While the unit is out, clean the window track, sill, and side panels. Mold grows in these areas from moisture escaping around the unit. Dirt and debris in the track prevent proper sealing, letting hot air infiltrate around the AC.
Vacuum the track thoroughly, then wipe with diluted bleach solution (1:10 bleach to water) if mold is visible. Let it dry completely. Check side accordion panels and foam seals for damage—these wear out faster than people expect and compromise efficiency significantly. Replace damaged seals before reinstalling the unit.
When You're Dealing With Mold
Spotting the Difference
Gray or brown dust wipes away easily. Mold appears as black, green, or white fuzzy patches that resist simple wiping, typically in drain pans, evaporator coils, and damp corners. The smell confirms it—musty, earthy odors that intensify when the unit runs.
Quick Treatment for Surface Mold
Vinegar solution (1:1 with water): Spray affected areas, wait 15 minutes, scrub with a soft brush, rinse. Kills most mold species without corroding metal components. Works slower but prevents regrowth better than bleach.
Bleach solution (1:10 with water): Kills surface mold faster but corrodes aluminum and copper with repeated use. Reserve this for plastic drain pans with heavy contamination. Never use on coils or metal surfaces repeatedly.
Always wear an N95 mask and gloves when cleaning mold. Work in ventilated areas. Never mix cleaning products—bleach plus vinegar or ammonia creates toxic chlorine gas.
When Cleaning Isn't Enough
Mold growing inside coil channels, behind insulation, or throughout internal chassis areas can't be reached with spray bottles. Clean all visible surfaces but musty odors persist or return within days? Hidden colonies remain in inaccessible areas. Learn how to clean mold out of an air conditioner using methods that address growth you can't see or reach with basic cleaning.
Recurring mold despite thorough cleaning signals excess moisture problems. Verify drain channels flow freely and the unit tilts slightly backward (1/4 inch) so water drains out instead of pooling internally.
The replacement decision: Professional deep cleaning costs $75-150. Units older than 7-8 years with persistent mold problems often cost more to remediate than replacement models cost. If insulation absorbed mold or colonies established throughout the blower housing, replacement beats remediation.
Your Seasonal Cleaning Calendar
 Monthly During Active Use (10 Minutes)
Pull the filter and inspect it. Dusty or visibly dirty? Wash it. Looks relatively clean? Put it back and check again in two weeks if you have pets or live in a dusty area. Wipe down the front vents and exterior case—dust buildup here indicates the filter isn't catching everything it should.
Check the condensate drainage by looking at the back of the unit. Water should drip steadily when the AC runs in humid weather. No dripping but high humidity? The drain system might be clogged. Excessive dripping indoors? The unit needs releveling or drain channels are blocked.
Listen for new sounds. Rattling, grinding, or buzzing that wasn't there last month signals loose parts or debris in the fan. Address these immediately before they cause mechanical damage.
Pre-Summer Deep Clean (45-60 Minutes)
Do this in late April or early May before the first serious heat wave. You want peak efficiency when you need it most, not struggling with a dirty unit during the first 90-degree day.
Remove the unit completely. Clean both coil sets thoroughly with coil cleaner. Straighten bent fins. Clear all drain channels and flush with diluted vinegar. Wash the filter even if it looks okay—winter dust settles on everything. Inspect and clean fan blades if accessible. Check the window seal and accordion panels for damage. Replace worn weatherstripping before reinstalling.
This deep clean establishes baseline efficiency for the season. Skipping it means you're starting summer already down 15-20% in performance.
Mid-Season Maintenance (July/August)
Around mid-summer, repeat coil cleaning if you're running the unit constantly. Heavy use means more dirt accumulation. Peak-season operation in dusty areas, near construction, or with pets warrants this second cleaning. Otherwise, filter washing and drainage checks suffice.
Monitor energy bills. Sudden increases compared to last July suggest dirt buildup reducing efficiency—time for unscheduled coil cleaning. Our smart AC controllers will help you with energy savings.
 End-of-Season Shutdown (September/October)
Before storing the unit, clean everything thoroughly. Mold grows aggressively on damp, dirty surfaces during off-season storage. Wash filters, clean coils, flush drain channels, and wipe all surfaces. Most importantly, let the unit dry completely—run it on fan-only mode (no cooling) for 2-3 hours to evaporate residual moisture from coils and internal spaces.
The storage mistake that ruins units: Putting a damp unit directly into storage. Moisture trapped inside creates perfect mold conditions. Come next spring, you're dealing with contamination throughout the system. The 2-3 hour drying run prevents this entirely.
Remove the unit from the window if possible. Store indoors in a dry location, covered with a breathable fabric (old sheet or canvas). Plastic bags trap moisture and promote corrosion. Garage or basement storage beats outdoor sheds where temperature and humidity fluctuations accelerate deterioration.
Leave it installed through winter? Cover the exterior with an AC cover that allows some airflow. Completely sealed covers trap moisture. Remove the cover monthly to check for condensation or pest intrusion.
Off-Season Check (January/February)
If you stored the unit, inspect it mid-winter. Look for mouse nests (they love warm, enclosed spaces), rust spots indicating moisture problems, or musty odors suggesting mold growth. Catching these issues in February beats discovering them during May's first heat wave when HVAC technicians are booked solid.
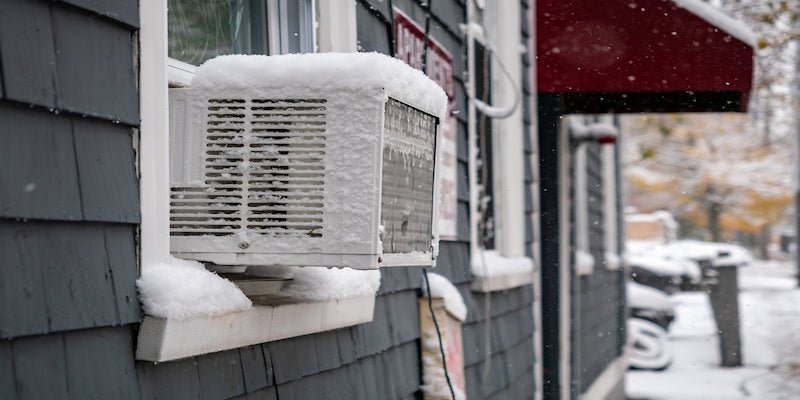
Units left installed should be checked after major storms. Heavy snow, ice, or wind can damage exposed components. Ensure the cover remains secure and water hasn't infiltrated around the installation.
FAQ
Can I clean my window AC without removing it from the window?
Yes, for basic maintenance. Pull the filter, vacuum accessible coils, wipe surfaces, and clear visible drains while installed. This handles monthly cleaning adequately. Deep cleaning requires removal to reach back coils, internal drain systems, and fan components.
My filter looks fine but the unit still smells musty. What's wrong?
The odor comes from mold on evaporator coils or standing water in the drain pan, not the filter. Remove the front panel and inspect coils directly-look for black or green spots. Even without visible growth, slime coating metal surfaces produces odors. This requires coil cleaning with antimicrobial treatment.
How long should I wait before turning on my AC after cleaning?
Wait 2-3 hours for coils to dry completely after using cleaner or water. Damp filters need 24-48 hours before reinstallation. Running the unit wet risks electrical shorts. Some people run fan-only mode for 15-20 minutes after reassembly to evaporate residual moisture before switching to cooling.
Why does water drip from the front of my AC instead of the back?
Three causes: clogged drain channels, improper tilt angle (unit level or sloping forward instead of backward), or rusted drain pan holes. Clear drain blockages first with a pipe cleaner. Verify the unit slopes 1/4 inch lower in back. If drainage works but water still leaks inside, the pan needs repair or replacement.
Is it worth paying for professional cleaning versus doing it myself?
Professional cleaning ($75-150) makes sense for heavy units you can't safely remove, extensive mold requiring specialized treatment, or time constraints. DIY costs under $20 and takes 45-60 minutes. Most people handle their own maintenance with basic tools. Reserve professional help for problem situations or physical limitations.


.png?height=200&name=image_2024-07-11_20-09-51%20(1).png)


